
How to Plant Garlic
With the frequency in which we use garlic to flavor our foods, it only makes sense that we would want to also grow it ourselves. Today, we’re sharing this tutorial for how to plant garlic in your own backyard garden.

Planting Garlic in your Backyard Garden
Our parents immigrated from Croatia back in the 70s and have been growing garlic in their backyard ever since. Over the years, the amount of garlic planted has increased exponentially from a dozen to over 150 most recently this past year. What do they do with that much garlic you ask? Well, cooking recipes like this sliced tomato with basil and garlic and this traditional blitva dish, to this classic beef goulash; making homemade salsa and pasta sauce and of course to giving it away to friends and family, each and every garlic clove is lovingly used.

Trust me that the time and effort it takes to plant garlic will be well worth it. Instead of buying imported garlic from the grocery stores, you will be relieved to know that the garlic you’re using has been locally and organically grown in your own backyard. If you don’t have a plot of land, you can also plant garlic in a pot with nutrient rich soil. Just be sure to water more often as the soil in any pot dries quicker than the ground.
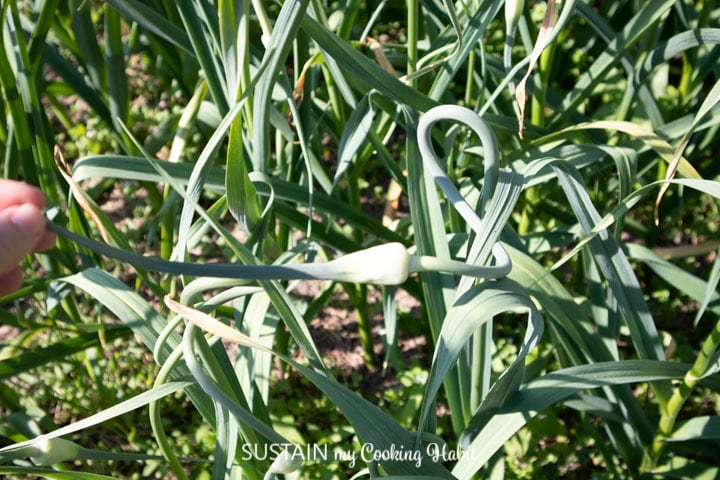
What does a garlic plant look like?
Growing garlic looks very much like onion except the green stems are thinner and stiffer than those of onions. Near when the garlic is ready for harvesting, it will produce a long, leafless flowering stem that sprouts directly from the garlic bulb. Known as the scapes, it will form a flower at the tip; which then produce seeds for future planting. We use the scapes to make a delicious and versatile garlic pesto.
When to Plant Garlic
The growing season for garlic is long but ultimately there are two different ways and times to plant garlic. Since garlic is a hearty plant, it can withstand the cold Winter weather (even here in South Western Ontario).
Method 1: Grow garlic from seed in the Summer months
Growing garlic from seed can be done although the growth stages are much longer with a lot more time needed before the garlic is ready for harvesting. If the garlic scapes are left on the garlic bulb, they will turn to flower and then seed and often will seed themselves in the soil. You will first see the seedlings poke through the soil the following year after the scapes have flowered. You will then need to leave the garlic to continue to grow another full year before harvesting
Method 2 – Grow garlic from cloves in the Autumn months
Our preferred method of planting garlic is to plant the garlic cloves in the late Fall months, ideally sometime in October (before the first frost) giving your garlic a good start for growing.
As soon as the ground thaws after Winter, the garlic will begin growing allowing you to have an earlier July harvest. Planting the garlic bulbs in Spring is still possible but keep in mind the garlic will likely not grow as large and will be harvested later. Follow the steps we outlined below to get your garden ready and cloves planted.
How to Plant Garlic Bulbs Outdoors
Another nice thing about planting garlic is that you can use the cloves you buy at the grocery store. No need to search for special garlic bulbs at a nursery, the same cloves you use to cook with can also be planted to grow more.
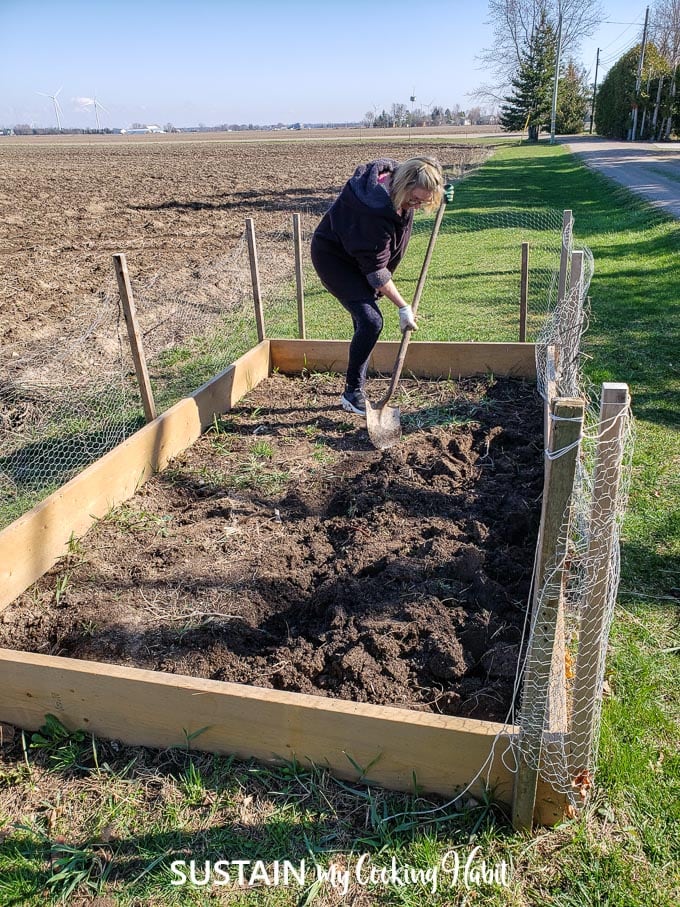
Using a hoe, turn the soil in the area you plan to place your garlic bulbs. Dig out a shallow ditch in the soil the full length of the garden about 2″ deep.
Sprinkle the small ditch with manure or compost and then blend together gently using a rake. This will help to ensure the soil is full of nutrients for healthy growth.

Starting at one end of the row, place a garlic clove into the center of the ditch. Ensure the root side of the bulb is facing down into the soil. Push the bulb into the dirt gently to hold it in place.
Continue adding one clove at a time into the garden spacing them 2” apart. We plan to harvest some of the garlic earlier on so we will be thinning out the plants making more room for the others to grow larger. If you plan to wait until all the garlic is mature, you should increase the spacing between the onions to 5”.
Once all cloves are in place, grab a watering can with room temperature water and water.
Using your hands, gently cover the cloves with soil.
After the Winter thaw, the garlic will begin to sprout. Leave the garlic to grow, periodically watering the soil as needed.

Got a Critter Problem?
If critters are a problem in your area, consider putting chicken wire two feet high around the garden as we’ve done here. Staple the wire to wooden posts in all four corners to secure in place.
When To Harvest Garlic

When ready, typically at the start of Summer (early July to early August) pull the garlic from the soil. Cut the hangings roots just below the bulb and cut the stem at about 6” from the bulb. Work the dirt away with your hands leaving the protective casing on the cloves until ready to use in your cooking. Do not wash the garlic.

How Long will Harvested Garlic Last
Harvest garlic has a very long shelf life. After harvesting the garlic in the Summer, it can be stored in a cool and dry location for the whole year.
Coming Up…
In the coming months, we’ll be starting our indoor garden, certain plants are best to start earlier from seed to be ready for transplanting in the Spring.
Looking for more gardening tips and how-to? Check out our beginner gardening series:
Planning Your Backyard Garden
Supplies to Get for Making a Small Backyard Garden
Preparing the Backyard Garden for Planting
Planting Vegetable (Pepper) Seeds Indoors
How to Plant Lettuce Seeds Outdoors
How to Plant Onion
Planting Beets Outdoors
And be sure to join our Facebook group where we’re we’ll be answering each others’ questions, sharing our gardens as they grow and troubleshooting along the way.

Like it? Pin it for later!


After planting, lay down a protective mulch of straw, chopped leaves or grass clippings. In cold-winter regions the mulch should be approximately 4 inches thick. Mulch will help to prevent the garlic roots from being heaved out of the ground by alternate freezing and thawing. A light application of mulch is useful in milder climates to control the growth of winter weeds.