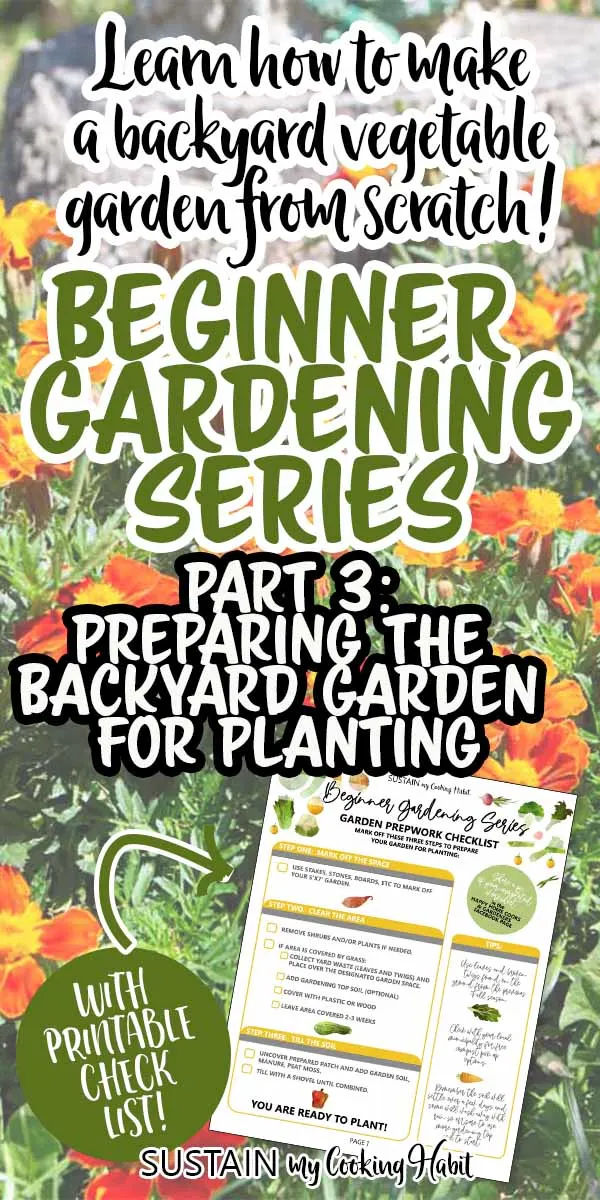
Welcome back to our Beginner Gardening Series. Over the next few weeks we’ll go through the process of making a 5’x7’ backyard vegetable garden, step-by-step. Last week we covered the supplies needed for backyard vegetable gardening. If you haven’t yet, visit that post and download the printable shopping list. This week we’re going to start getting our hands dirty and go through how to prepare a garden bed for planting.

If you’d like to jump to a previous week, here is what we’ve covered (and will be covering):
Planning Your Backyard Garden
Supplies to Get for Making a Small Backyard Garden
Preparing the Backyard Garden for Planting (we are here)
Planting Vegetable (Pepper) Seeds Indoors
Weeks 1-3: How to Plant Lettuce Seeds Outdoors
Weeks 1-3: Planting Cold Crop Bulbs (we are here)
Weeks 2-4: Planting Beets and Herb Seeds Outdoors (coming soon)
Garden Maintenance (coming soon)
Weeks 6-8: Planting Seedlings to the Garden (coming soon)
Troubleshooting (coming soon)
First Harvest! (coming soon)
And be sure to join our Facebook group where we’re we’ll be answering each others’ questions, sharing our gardens as they grow and troubleshooting along the way.


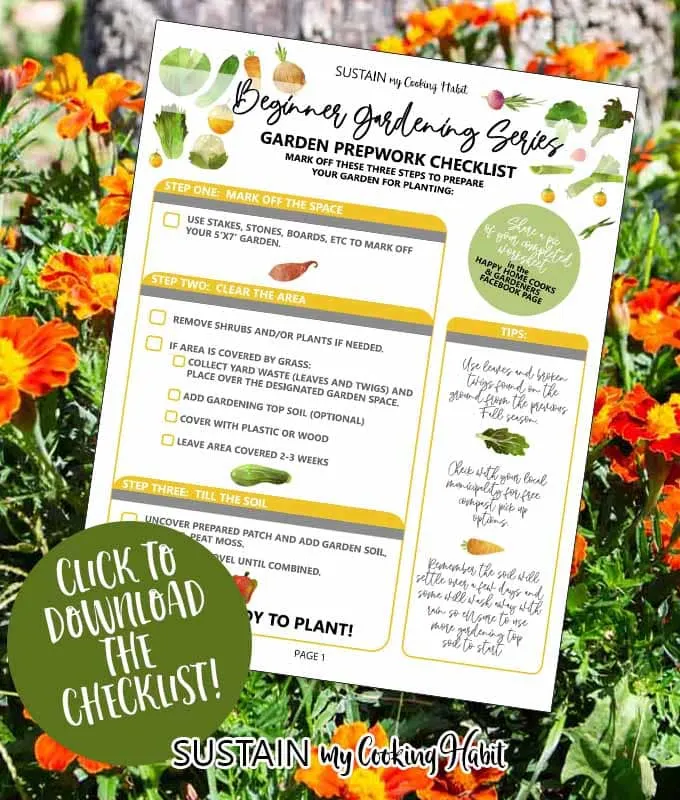
How to Prepare a Garden Bed
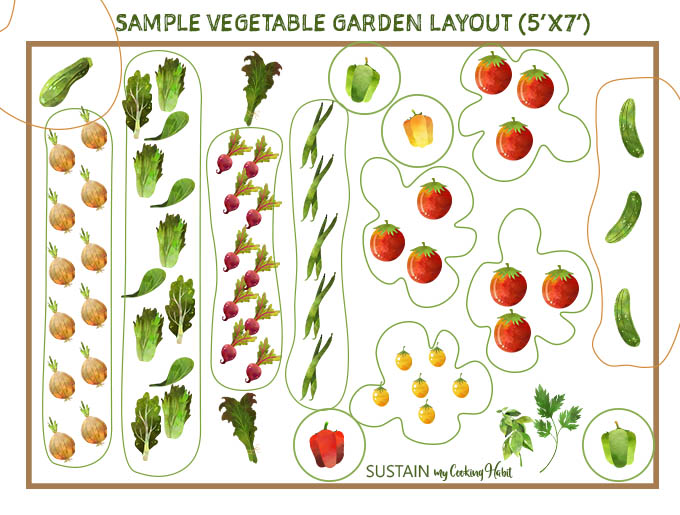
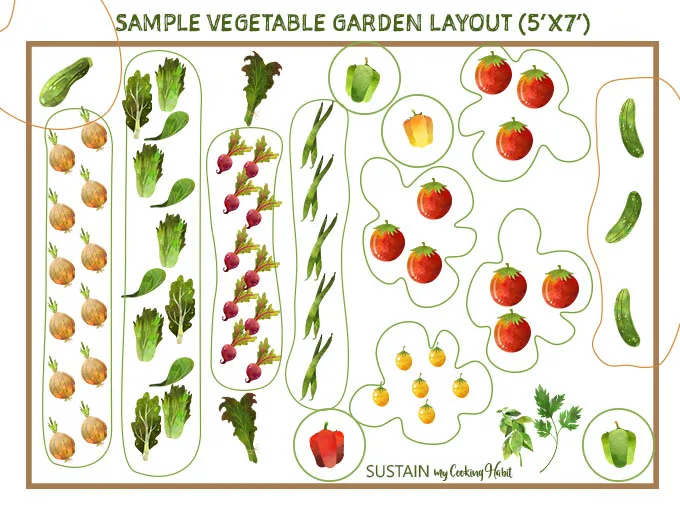
If you recall, we are working toward this sample garden layout, or whichever you planned out in Part 1.
Next we’ll cover the steps needed to get your garden ready for planting. Download the Garden Prep Checklist to help guide you and track your progress.

Let’s get digging!
Disclosure: This post contains affiliate links for your shopping convenience. You can find our full disclosure here.
Step 1: Mark off the Space
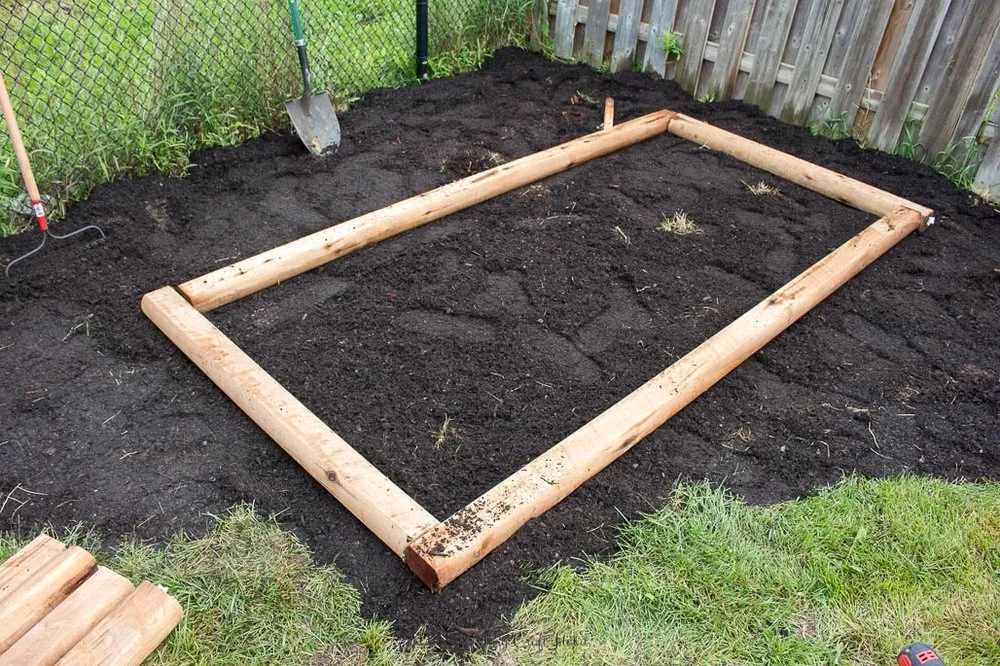
After Part 1’s planning exercise you should have decided where to place your 5’x7’ garden. Grab a measuring tape and physically mark off the garden. You can place some stakes or branches in the corners or even larger rocks, just to indicate where your garden will be.
If you have a bit more time and materials, you could border the area with 2”x6” wood planks, build a simple raised garden bed or even buy one that requires no tools to assemble. But this is not at all necessary – keep it simple if you are just starting out!

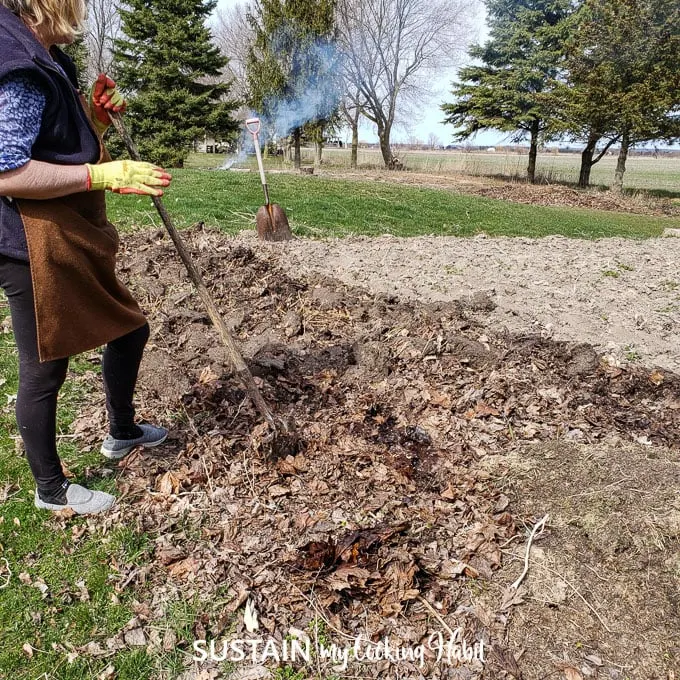
Step 2: Clear the Area
If you’re like most of us, the space that you’ve set aside may be covered in grass, shrubs or other plants. If you do have shrubs or larger plants, you’ll want to dig them up with a shovel and either relocate or dispose of them.
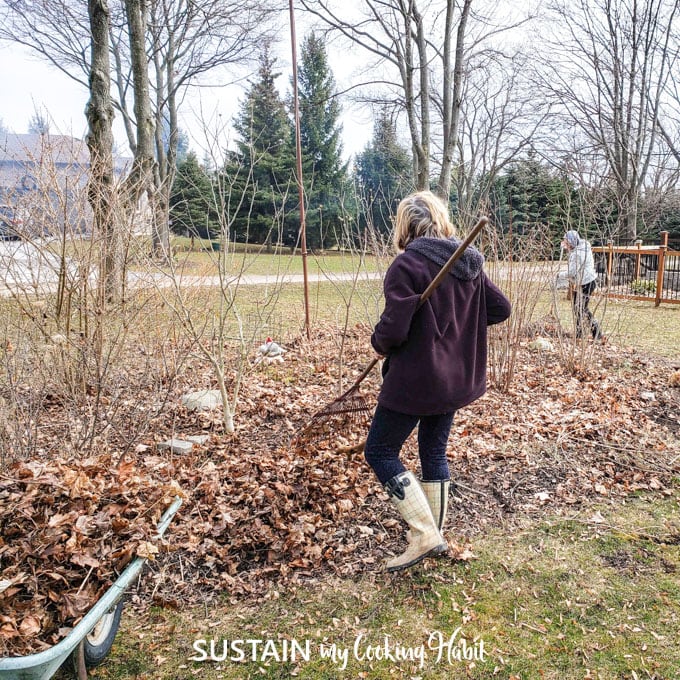
Next you’ll want to kill off any of the grass in the space you have marked off. Here is the simplest way to do so:
- As you are raking up your yard from the winter collect all of the yard clippings (i.e. leaves, branches even shredded newspaper) and place it in your new garden space;
- If you have it, dump a bag of soil in the space;
- Cover the entire area with some plastic (large garbage bags work great as you can still use them afterwards) or planks of wood;
- Leave the area covered for 2-3 weeks to let the grass fully decompose.

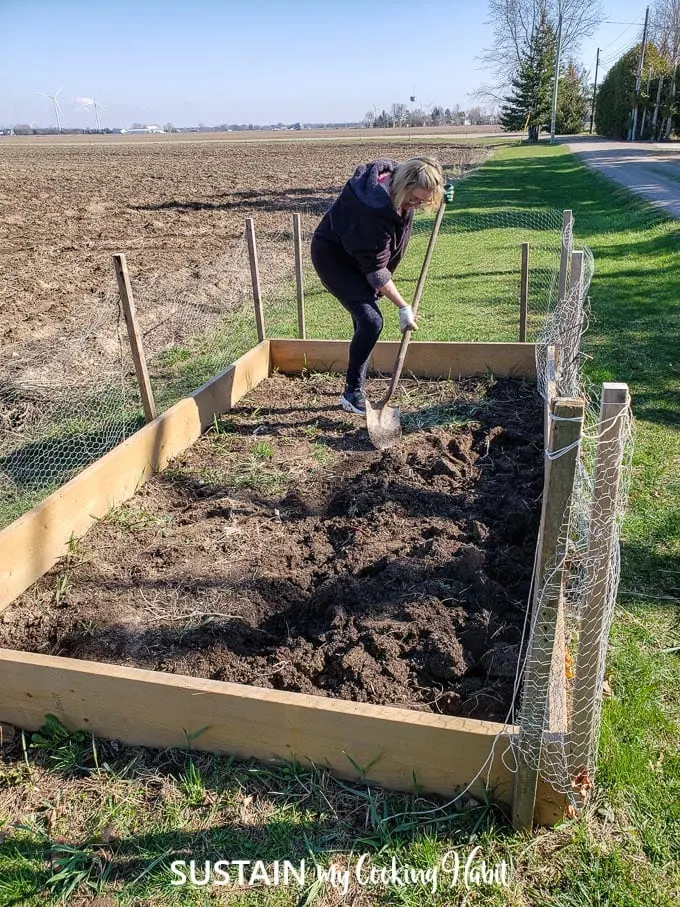
Step 3: Till the Soil
In the meantime, buy:
- several bags of garden soil
- 1/3 the amount of sheep or cow manure
- small bag of peat moss (helps to retain moisture and adds acidity to soil)
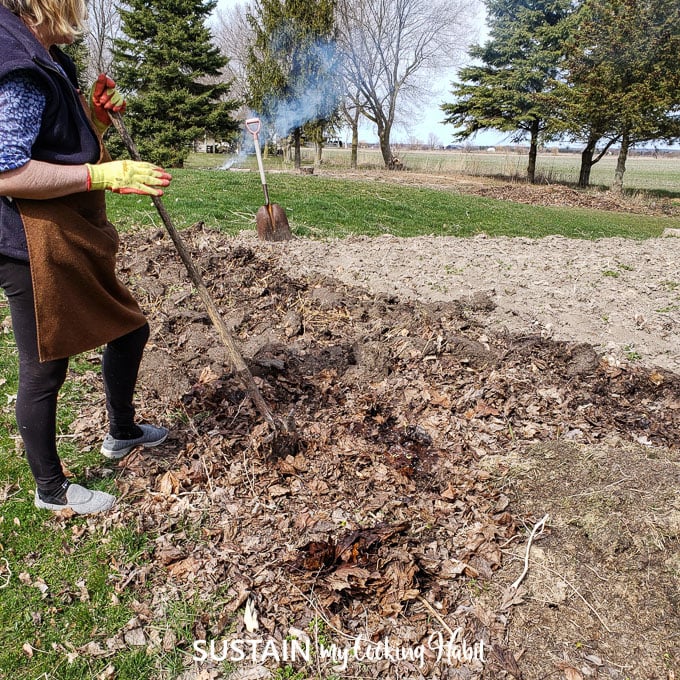
After 2-3 weeks, uncover the garden patch. Use the spade to turn the decomposed grass, yard waste and soil underneath over (ie. till it). This is a great time to add dry leaves and other yard waste (if you have it) and till it in.
Add soil, manure and peat moss. Work the area well with a shovel, mixing together all the added and soil underneath. In the end you are aiming for about 1 foot of good growing soil.
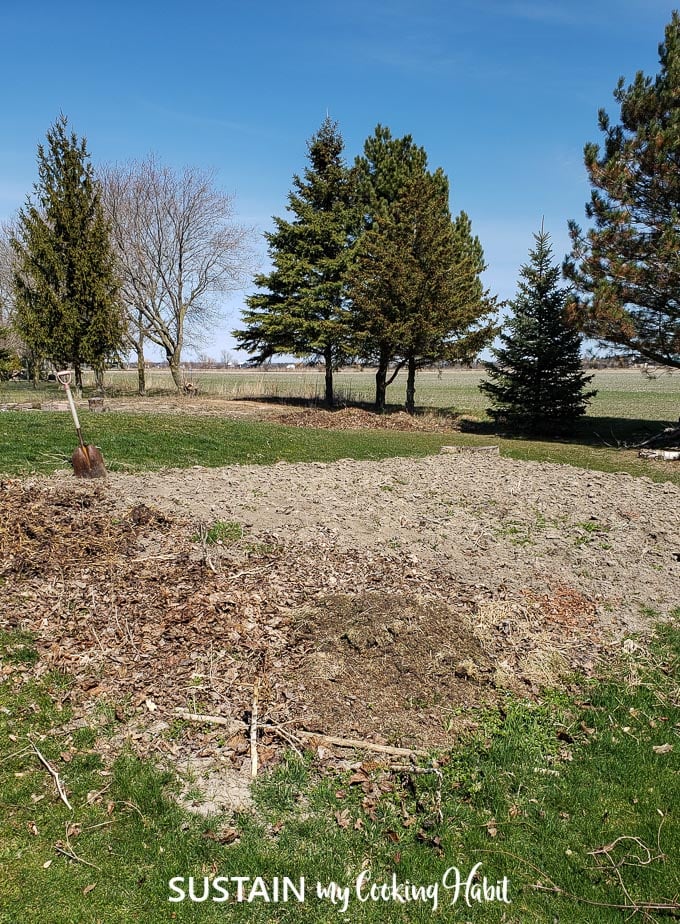
Your new garden is ready for planting!
We’ve created this Preparing Your Garden Checklist for our reference.
What comes next?
If you have your onion seeds, now’s a great time to plant them in the first row. We’ll have a post shortly on planting onion and lettuce seeds with all the details. And next week we’ll share a tutorial on planting seeds indoors, addressing questions about what types of seeds to plant and how to care for them until they are ready for transplanting.
We hope you’ve found this tutorial on how to prepare a garden bed helpful. Be sure to share a picture of your new garden space in the Happy Homecooks and Gardeners Facebook Group. We can’t wait to see what you’ve built!
Like it? Pin it for later!